INTERNATIONAL CO.,LTD.")

Are you tired of the outdated look of your current ceiling light fixture? Or perhaps you're interested in upgrading to a more energy-efficient LED option? Whatever your reason, replacing a flush mount LED ceiling light is a manageable and rewarding DIY project that can enhance both the functionality and aesthetics of any room in your home. In this comprehensive guide, we'll walk you through each step of the replacement process, providing detailed instructions and helpful tips along the way.
Understanding Flush Mount LED Ceiling Lights
Before diving into the replacement process, let's take a moment to understand what flush mount LED ceiling lights are and why they're a popular choice for many homeowners.
What are Flush Mount LED Ceiling Lights?
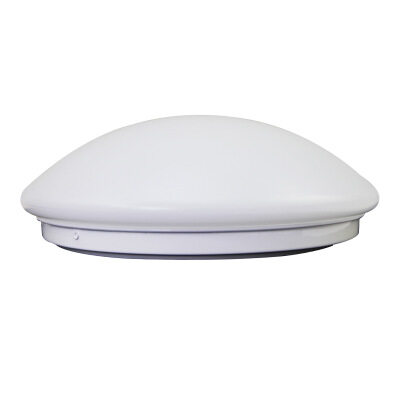
Flush mount LED ceiling lights are fixtures designed to sit close to the ceiling surface without leaving any gap or space between the fixture and the ceiling. This sleek and modern design provides a clean and unobtrusive look that complements a wide range of interior styles. Additionally, LED technology makes these fixtures energy-efficient and long-lasting, offering both cost savings and environmental benefits compared to traditional lighting options.
Why Choose LED?
LED lighting has revolutionized the way we illuminate our homes. LED bulbs are known for their energy efficiency, durability, and versatility. They consume less energy than traditional incandescent bulbs and have a much longer lifespan, reducing the need for frequent replacements. LED lights also produce less heat, making them safer and more comfortable to use in enclosed spaces like ceilings.
Step-by-Step Guide to Replacement
Now that you have a basic understanding of flush mount LED ceiling lights, let's walk through the process of replacing your existing fixture with a new LED option.
1. Gather Your Tools and Materials
Before you begin, it's essential to gather all the necessary tools and materials for the job. You'll typically need:
- A ladder or step stool
- A screwdriver (usually Phillips or flat-head)
- The new flush mount LED ceiling light fixture
- Wire nuts (if not included with the fixture)
- A voltage tester
Having everything you need on hand will help streamline the installation process and ensure you're prepared for any unexpected challenges.
2. Turn Off the Power
Safety should always be your top priority when working with electrical fixtures. Start by turning off the power to the existing ceiling light at the circuit breaker or fuse box. Once you've turned off the power, use a voltage tester to double-check that the electricity is indeed off before proceeding. This step is crucial for preventing electrical shocks or accidents during the installation process.
3. Remove the Old Fixture
With the power safely turned off, you can now remove the old flush mount ceiling light fixture. Start by loosening and removing the screws or bolts that hold the fixture in place. Once the screws are removed, gently lower the fixture from the ceiling, taking care not to damage any wires or connections. With the fixture removed, you'll have access to the electrical wiring that powers the light.
4. Disconnect the Wiring
Before disconnecting the wiring, take note of how the old fixture is wired to ensure you can reconnect the new fixture correctly. Typically, you'll find three wires: black (hot), white (neutral), and sometimes green or bare (ground). Carefully disconnect the wires by loosening the wire nuts or screws that secure them in place. Once the wires are disconnected, you can set the old fixture aside.
5. Install the New Fixture
Now it's time to install the new flush mount LED ceiling light fixture. Start by connecting the wires from the fixture to the corresponding wires in the ceiling, following the manufacturer's instructions carefully. Typically, you'll twist together the black wires, the white wires, and the ground wires (if present), securing them with wire nuts. Once the wires are securely connected, carefully tuck them into the electrical box in the ceiling.
6. Attach the Fixture
With the wiring complete, you can now attach the new flush mount LED ceiling light fixture to the ceiling. Align the fixture with the mounting screws or bolts in the electrical box and secure it in place using the provided hardware. Make sure the fixture is flush against the ceiling surface and stable before proceeding.
7. Test the Fixture
Before you finish up, it's crucial to test the new flush mount LED ceiling light to ensure it's working correctly. Turn the power back on at the circuit breaker or fuse box and flip the light switch to activate the fixture. If everything is working as it should, congratulations – you've successfully replaced your flush mount LED ceiling light!
Tips for Success
1. Measure Twice, Install Once
Before you start the installation process, double-check the dimensions of both the old and new fixtures to ensure they're compatible. This will help prevent any unexpected surprises or issues during installation.
2. Enlist a Helper
Installing a ceiling light fixture can be a bit tricky, especially if you're working alone. Enlist the help of a friend or family member to hold the fixture in place while you make the necessary connections and attach it to the ceiling.
3. Don't Rush
Take your time during the installation process and follow the manufacturer's instructions carefully. Rushing through the job could lead to mistakes or accidents, so it's essential to proceed with caution and attention to detail.
4. Dispose of Old Fixtures Responsibly
Once you've replaced your old flush mount LED ceiling light, be sure to dispose of the old fixture responsibly. Check with your local recycling center or waste management facility for guidance on how to properly dispose of old lighting fixtures and bulbs.
Conclusion
Replacing a flush mount LED ceiling light may seem like a daunting task, but with the right tools, materials, and know-how, it can be a straightforward and rewarding DIY project. By following the step-by-step guide outlined in this article and keeping safety in mind, you can upgrade your home's lighting with ease. So why wait? Get started today and illuminate your space with style and efficiency!
Email format error
Email cannot be empty
Email already exists
6-20 characters(letters plus numbers only)
The password is inconsistent
Email format error
Email cannot be empty
Email does not exist
6-20 characters(letters plus numbers only)
The password is inconsistent
